> For the complete documentation index, see [llms.txt](https://docs.rox.com/development/llms.txt). Markdown versions of documentation pages are available by appending `.md` to page URLs; this page is available as [Markdown](https://docs.rox.com/development/engineering/docs/rox-enterprise-integrations/enterprise-sso-via-auth0.md).
# Enterprise SSO via Auth0
Let your team sign in to Rox with your company's Identity provider
{% hint style="info" %}
Only Enterprise organizations can use this feature.
{% endhint %}
This guide walks customer IT admins through setting up SAML SSO for Rox through Auth0 and validating how end users log in.
Once connected, your organization's users get two ways to access Rox:
* **IdP-initiated login** - Users sign in directly from their Identity Provider (e.g. Okta) and click the Rox tile from their app dashboard to land straight in the app.
* **SP-initiated login** - Users go to [run.rox.com](https://run.rox.com), enter their work email, and are automatically redirected to your IdP to authenticate before being brought into Rox.
Both flows are enabled by the same setup. Completing the wizard once unlocks both entry points for all users you've assigned in your IdP.
### Admin setup
Setting up SSO in Rox is done through a self-serve wizard powered by Auth0. Before diving in, have your IdP admin console open in a separate tab.
#### Step 1 - Start SSO setup in Rox
Go to **Rox → Settings → Workspace** and click **Set up** under **Single sign-on**.
#### Step 2 - Open the setup wizard
This opens the Auth0 setup wizard for SSO. Click **Get Started**.
#### Step 3 - Choose your IdP
Choose your Identity Provider and click **Next**.
> Note: If you are using Microsoft Entra ID as your IdP, please select '**Custom SAML**'
#### Step 4 - Complete the IdP setup in the wizard
Follow the setup steps shown in the wizard. This wizard guides you through six sub-steps that move information back and forth between Rox and your IdP
{% tabs %}
{% tab title="Okta Workspace" %}
{% stepper %}
{% step %}
**Create the application**
Create Rox as a new application inside Okta.
Use these values:
* **App name:** `Rox`
* **Logo:** Upload the Rox logo from [rox\_symbol.svg](https://run.rox.com/rox/new/rox_symbol.svg)
{% endstep %}
{% step %}
**Paste the Single Sign-on URL and Audience URI**
Once the app is created, the wizard will show you two values, the **Single Sign-on URL** and the **Audience URI.** These tell your Okta where to send users after they authenticate, and how to identify Rox as the intended recipient.
Copy both values from the wizard and paste them into the matching fields in your IdP application.
{% endstep %}
{% step %}
**Configure attribute mapping**
Attribute mapping tells your IdP which user fields to pass to Rox during login. Without this, Rox won't receive the user's email or name, and login will fail.
Map the attributes shown in the wizard in your IdP:
* **email** → primary email field in your IdP
* **name** → full name field in your IdP
> **Okta users:** Use these specific mappings:
>
> * `email` → `user.email`
> * `name` → `user.firstName + " " + user.lastName`
> {% endstep %}
{% step %}
**Configure the connection**
Now that your IdP application is configured, you need to point the Auth0 wizard back to it. The Metadata URL is how the wizard discovers your IdP's settings automatically.
Copy the **Metadata URL** from your IdP application and paste it into the wizard under your provider configuration
{% endstep %}
{% step %}
**Assign access**
Before the connection can be tested, your IdP needs to know which users are allowed to use it. You can scope this broadly to a group or narrowly to specific users, either works.
Assign access in your IdP application based on the wizard instructions.
{% endstep %}
{% step %}
**Test the connection and enable it**
With everything configured, the wizard will let you run a test to confirm that the connection is working end to end. Don't skip this step, it's the only way to catch misconfigured attributes or URL mismatches before your users hit them.
Run the test in the wizard. If it passes, enable the connection to turn on SSO for your organization.
{% endstep %}
{% endstepper %}
{% endtab %}
{% tab title="Microsoft Entra ID" %}
{% stepper %}
{% step %}
**Select Custom SAML**
For Microsoft Entra, you need to click on the **Custom SAML** option, and click '**Next**'.
{% endstep %}
{% step %}
**Create the application**
Head over to Azure portal, and search for Enterprise applications
Click on '**New Application**'
Click on '**Create your own application**' and choose '**Integrate any other application**', enter '**Rox**' as name, and create.
After creating your application, Under '**Manage**', click on '**Properties**' to upload the Rox logo from [rox\_symbol.svg](https://run.rox.com/rox/new/rox_symbol.svg) and ensure '**Visible to users?**' is selected as '**Yes**'
{% endstep %}
{% step %}
**Paste the Single Sign-on URL and Audience URI**
Go to '**Single-Sign on**' under the '**Manage**' category and select the '**SAML**' option
Click on '**Edit**' and then click on '**Add identifier**' and '**Add reply URL**' inorder to open the input boxes.
Go back to the Rox Setup Wizard, and copy both the '**Single Sign-On URL**' and paste it in Azure portal's '**Reply URL**' field.
Similarly, go back to the Rox Setup Wizard, and copy both the '**Service Provider Entity ID**' and paste it in Azure portal's '**Identifier**' field.
After entering and validating both, Please click on '**Save**'
{% endstep %}
{% step %}
**Configure the connection**
Copy the '**App Federation Metadata Url**'
Go back to the Rox Setup Wizard, and click on '**Next**' to navigate to '**Configure Connection**' section. Ignore this if you are already there.
Paste the copied URL into the '**Metadata URL**' field and click '**Create connection**'
{% endstep %}
{% step %}
**Configure attribute mapping**
After creating Connection, you will be navigated to '**Attribute Mapping**' section
Then, copy the mapping of '**Required attributes**', and any other 'Optional attributes' required inorder to enhance the User profile.
Go back to the Azure enterprise app portal and click on '**Edit**' on the '**Attributes & Claims**' section.
Ensure the '**Claim** **name**'(s) is(are) present and equal to the mapping values you've copied. It dosen't matter which section are they present in the Azure portal.
{% endstep %}
{% step %}
**Assign access**
In your microsoft enterprise app, Under the '**Manage**' tab, Select the '**Users and groups**' tab and then click on '**Add** **user/group**'.
Before the connection can be tested, your Entra ID needs to know which users are allowed to use it. You can scope this broadly to a group or narrowly to specific users, either works.
{% endstep %}
{% step %}
**Test the connection and enable it**
We can test from both the portals. First head over to your microsoft enterprise app, click on '**Test**' button on '**Test single sign-on with Rox**' section.
With everything configured, the wizard will let you run a test to confirm that the connection is working end to end. Don't skip this step, it's the only way to catch misconfigured attributes or URL mismatches before your users hit them.
Run the test in the wizard. If it passes, enable the connection to turn on SSO for your organization.
{% endstep %}
{% endstepper %}
{% endtab %}
{% endtabs %}
#### Step 5 - Manage the SSO configuration later
Once the wizard completes, SSO is live for your organization. The **Setup** button in your organization settings will now show as **Reconfigure**, which you can use at any time if your IdP configuration changes or you need to update the connection.
### End-user login
Once the setup is complete, assigned users in the IdP can access Rox in two ways. Directly from their IdP, or by starting from the Rox login page. Both flows end up in the same place.
#### 1. IdP-initiated login
The user signs in to their Identity Provider and selects the **Rox** tile.
The user is then taken directly to the Rox app.
{% tabs %}
{% tab title="Example: Okta" %}
For Okta, see the example below of how the Rox tile appears on the user's Okta home page.
{% endtab %}
{% tab title="Example: Microsoft Entra ID" %}
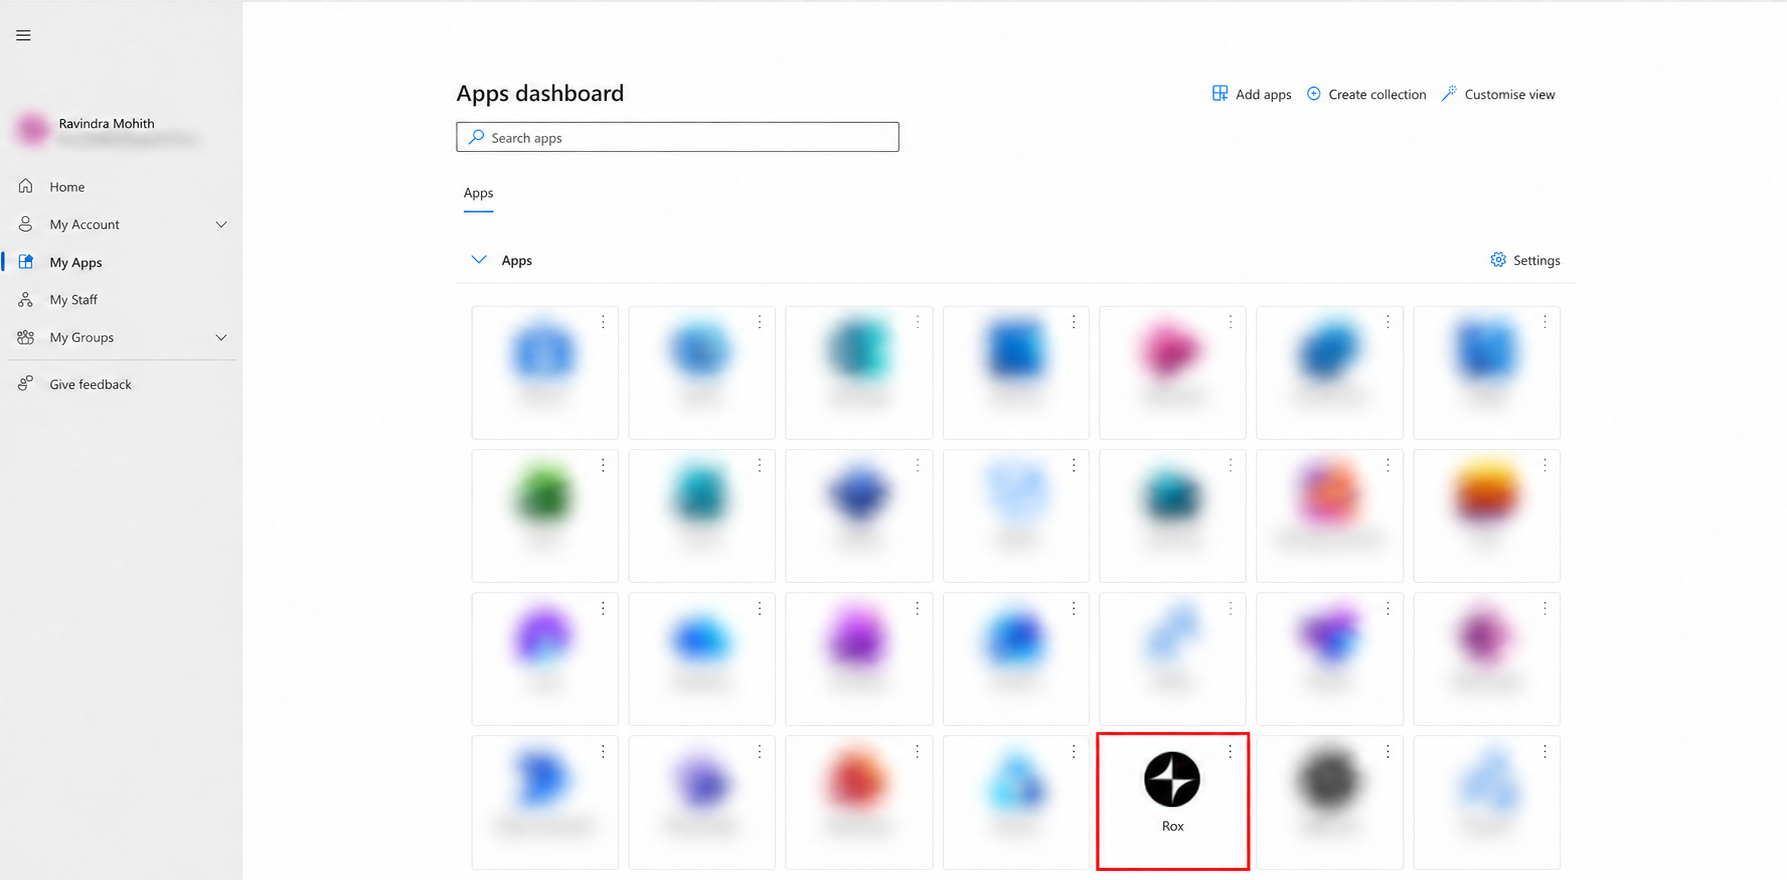
If you are using Microsoft Entra ID as your IdP, see the example below of how the Rox tile appears on the user's Microsoft '**My Apps**' dashboard.
{% endtab %}
{% endtabs %}
#### 2. SP-initiated login
The user goes to [run.rox.com](https://run.rox.com) and enters their email address.
After clicking **Continue**, the user is redirected to their Identity Provider login page.
After signing in, the user is taken directly to the Rox app.