> For the complete documentation index, see [llms.txt](https://docs.rox.com/development/llms.txt). Markdown versions of documentation pages are available by appending `.md` to page URLs; this page is available as [Markdown](https://docs.rox.com/development/engineering/docs/rox-enterprise-integrations/granting-microsoft-integration-permissions-for-rox.md).
# Granting Microsoft Integration Permissions for Rox
This guide walks through connecting a Microsoft 365 individual integration (Outlook Calendar / Outlook Mail) to Rox when your tenant requires admin consent. The flow spans both the end user and the Microsoft admin — follow the steps in order. (For orgwide integration refer this [doc](https://docs.rox.com/development/engineering/docs/rox-enterprise-integrations/orgwide-integration-via-microsoft-graph))
***
### Step 1 — Start the connection from Rox *(end user)*
From the Rox **Integrations** page, find the Microsoft integration (for example, **Outlook Calendar**) and click **Connect**.
Review the read/write access scopes Rox is requesting and click **Connect** to proceed.
### Step 2 — Request admin approval *(end user)*
You are redirected to Microsoft. If your tenant requires admin consent, an **Approval required** screen appears for **Rox 365 Integration** (publisher: **Rox Data Corp.**) listing the requested permissions:
* Read user calendars
* Have full access to user calendars
* View users' basic profile
* Maintain access to data you have given it access to
Enter a short justification (e.g., *"I want to sync my data to Rox"*) and click **Request approval**.
Microsoft approval required screen
### Step 3 — Confirmation that the request was sent *(end user)*
Microsoft displays a **Request sent** confirmation. Your admin is notified and you will receive an email once the request is reviewed. You can close this tab and wait for approval.
Microsoft request sent screen
### Step 4 — Open the consent request queue *(Microsoft admin)*
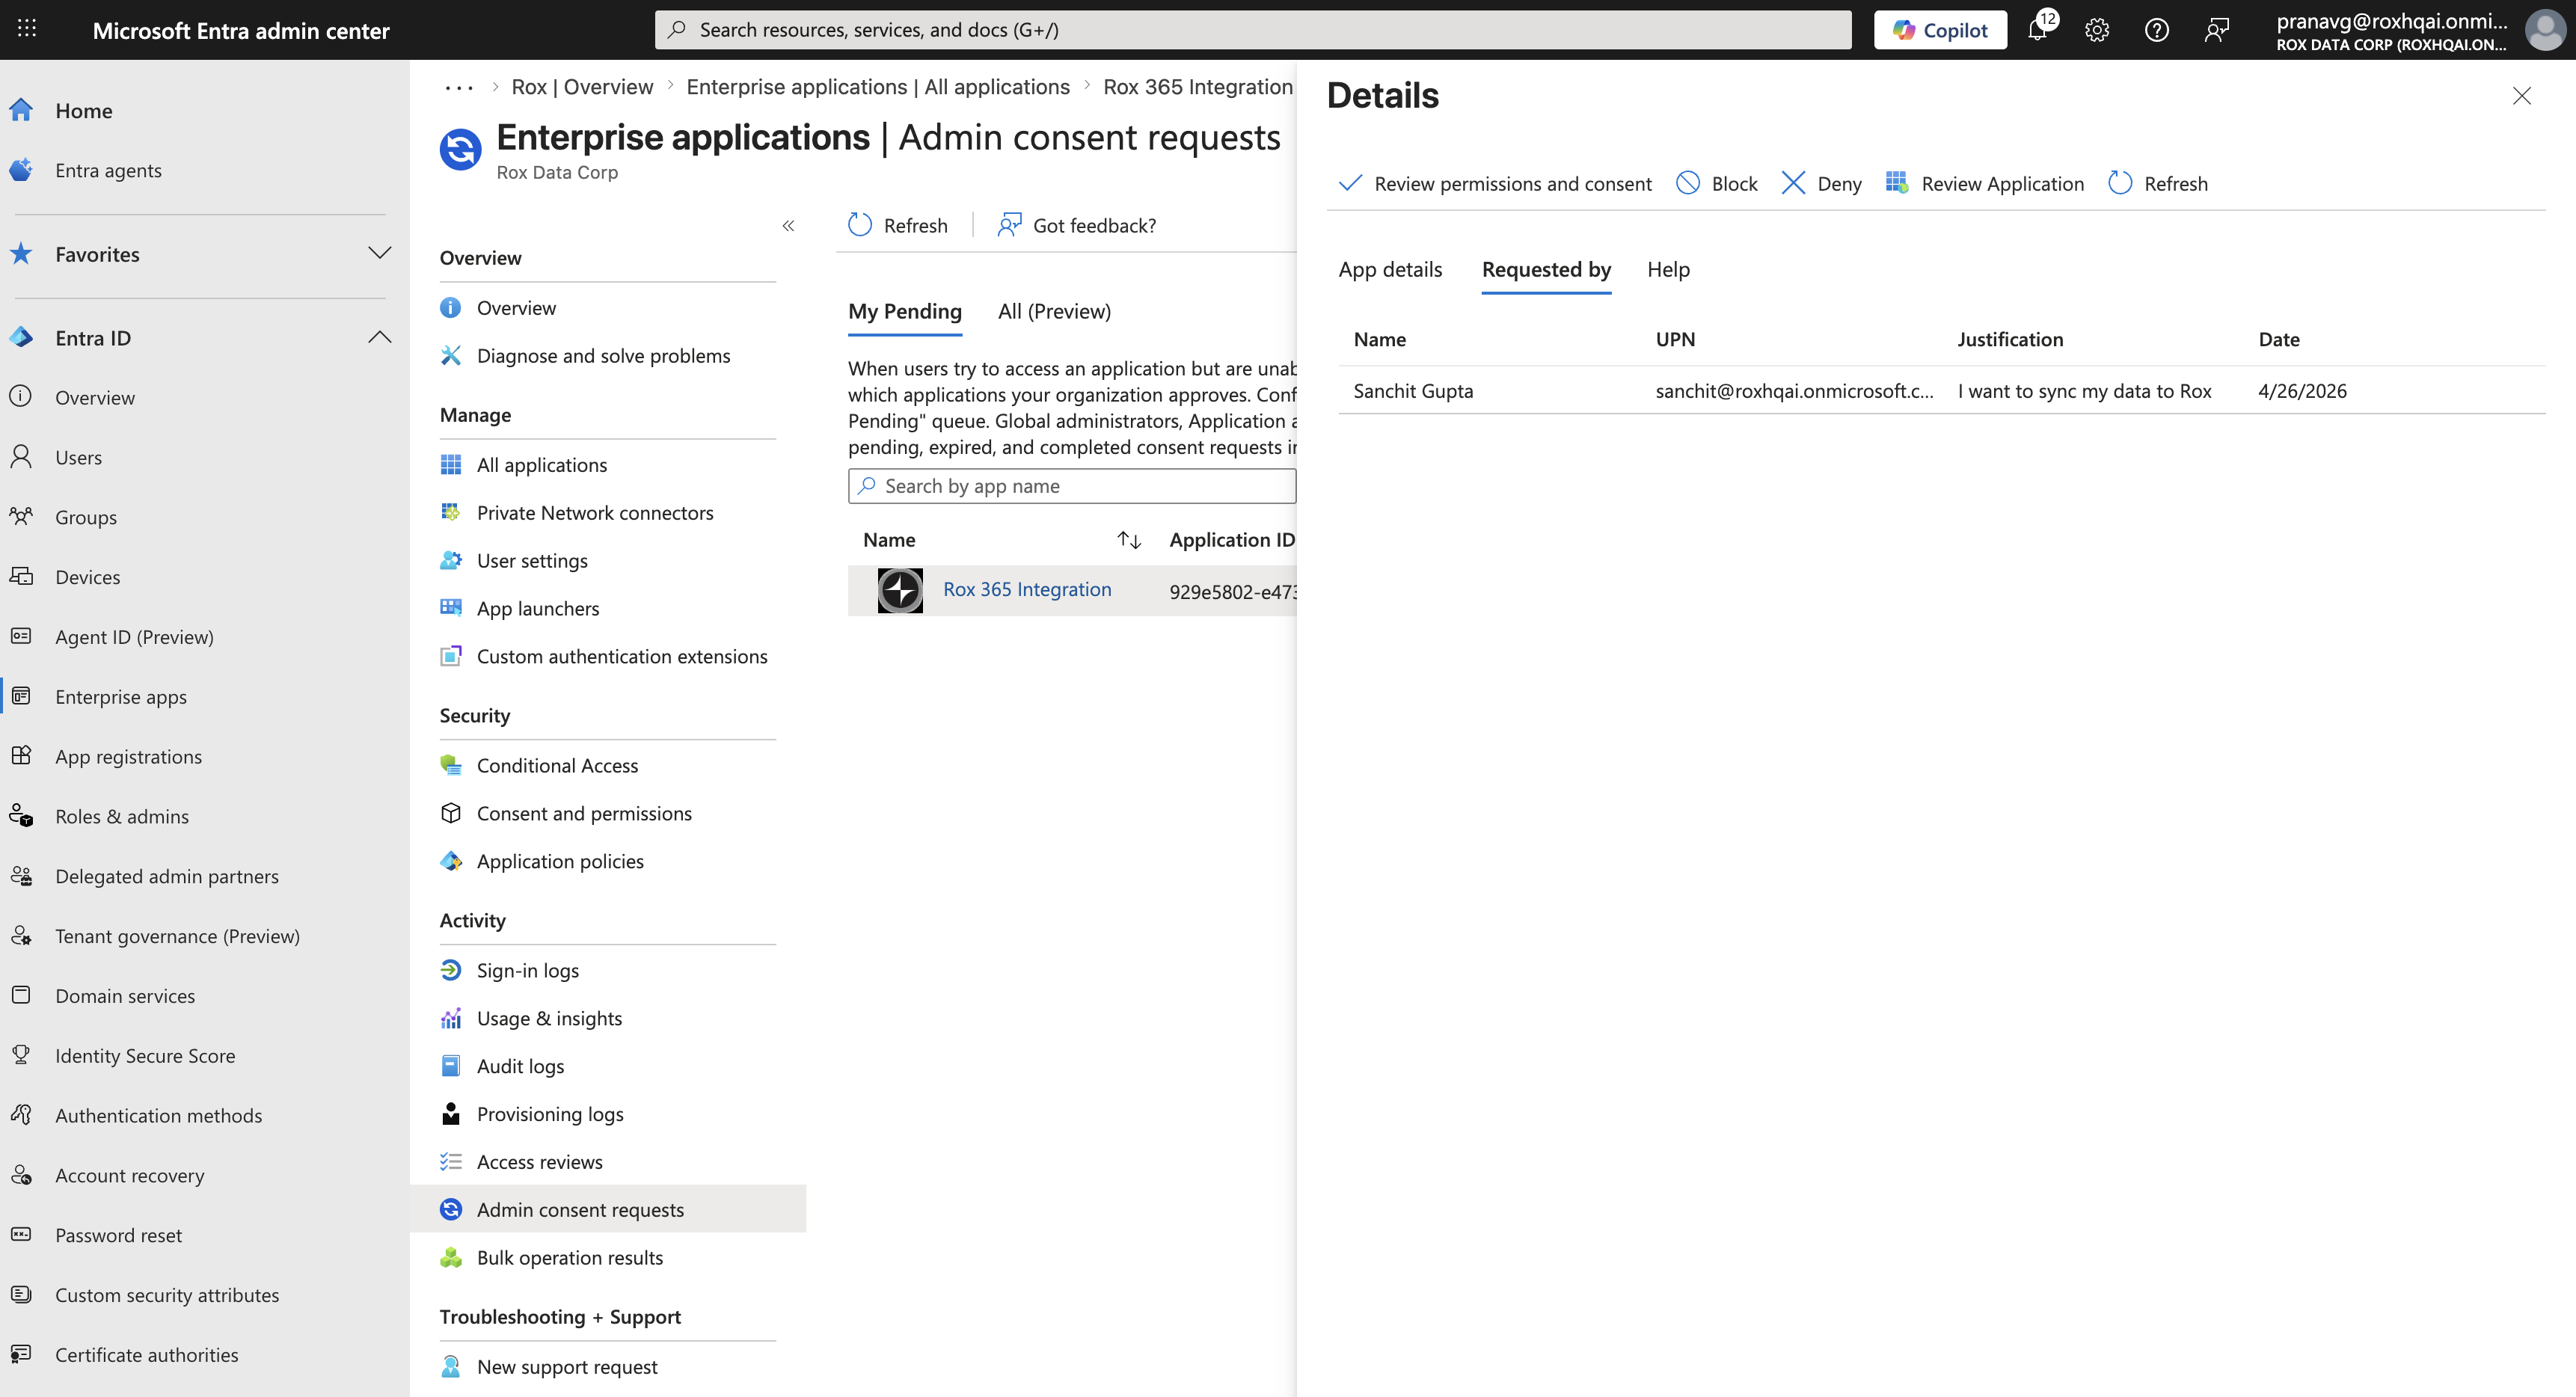
The admin signs in to the [Microsoft Entra admin center](https://entra.microsoft.com/) as a Global Administrator (or an Application Administrator with consent privileges) and navigates to **Entra ID → Enterprise apps → Admin consent requests**.
Pending requests for **Rox 365 Integration** appear under the **My Pending** tab. Select the request to open the details pane, verify the requester (UPN) and justification, then click **Review permissions and consent**.
Entra admin consent requests queue
### Step 5 — Grant consent on behalf of the organization *(Microsoft admin)*
A Microsoft consent dialog opens listing the permissions. Verify the publisher is **Rox Data Corp.** (verified badge visible) and click **Accept**.
This grants the permissions tenant-wide — no other user in your organization will be prompted again.
Microsoft permissions requested screen
### Step 6 — Verify granted permissions *(Microsoft admin)*
To confirm the consent was applied, go to **Enterprise apps → Rox → Permissions**. Under the **Admin consent** tab, the granted Microsoft Graph permissions should be listed, for example:
| API name | Claim value | Permission | Type |
| --------------- | --------------------- | ---------------------------------- | --------- |
| Microsoft Graph | `Calendars.Read` | Read user calendars | Delegated |
| Microsoft Graph | `Calendars.ReadWrite` | Have full access to user calendars | Delegated |
Entra Rox app permissions page
### Step 7 — Finish the connection in Rox *(end user)*
Once the admin has approved, the requesting user returns to Rox and clicks **Connect** again on the integration tile to complete the connection. No further Microsoft prompts should appear.
#### User Troubleshooting
If you are still unable to connect, please navigate to and search for "Rox 365 Integration".
Ensure that the permissions that your admin consented to are visible here.